We hope you have been having a lot of fun with the Open Beta release of the upcoming Riftbreaker 2.0 Update! We are really pleased with how this release has turned out. The vast majority of you have been reporting either minor bugs or no issues at all. Your feedback and error reports have also enabled us to identify several serious bugs and crashes. Throughout the course of the beta period, we were able to decrease the game’s crash rate per game session from 8% to 0.67%. Nonetheless, there are still many issues in our backlog that need to be fixed before we can consider it good enough to release to the public. Keep your feedback coming!

We hope that battling Omega creatures with your buddies and building Megastructures has been working well for you so far!
Speaking of feedback, there was a short period during the beta when we had to disable the Customize Difficulty option due to a bug. We thought that turning this feature off would be a minor nuisance at best. However, you quickly let us know how much you value the Custom Game mode and that you wanted it back ASAP. We did not expect this, but we were happy to rearrange our priorities to repair such a popular feature, so we got to work and gave the Custom Difficulty feature some much-needed maintenance. In this article, we will explain what each of the parameters actually does, what kind of problems we had to deal with, and give you a couple of custom mode game suggestions to try out for yourselves.

Setting enemy damage factor to 1% makes you almost indestructible against early game creatures. However, this is a false sense of security. Omega creatures and their Ultra buddies will still make short work of you!
ENEMY DAMAGE FACTOR - This setting allows you to control how much damage Mr. Riggs will take from enemy attacks. You can either decrease the damage from 1 to 99 percent or increase it up to 1000%. Please note that this setting does not affect the environmental damage - you can still blow yourself up if you’re not careful around exploding mushrooms, or walk into a magma pool. As a side note, even at 1000%, enemy attacks should not destroy Mr. Riggs with just one attack - our special ‘protective bubble’ will activate when you’re at 50 HP, giving you a second chance at survival. Higher values are definitely for bullet hell fans only, as there is not much room for error.
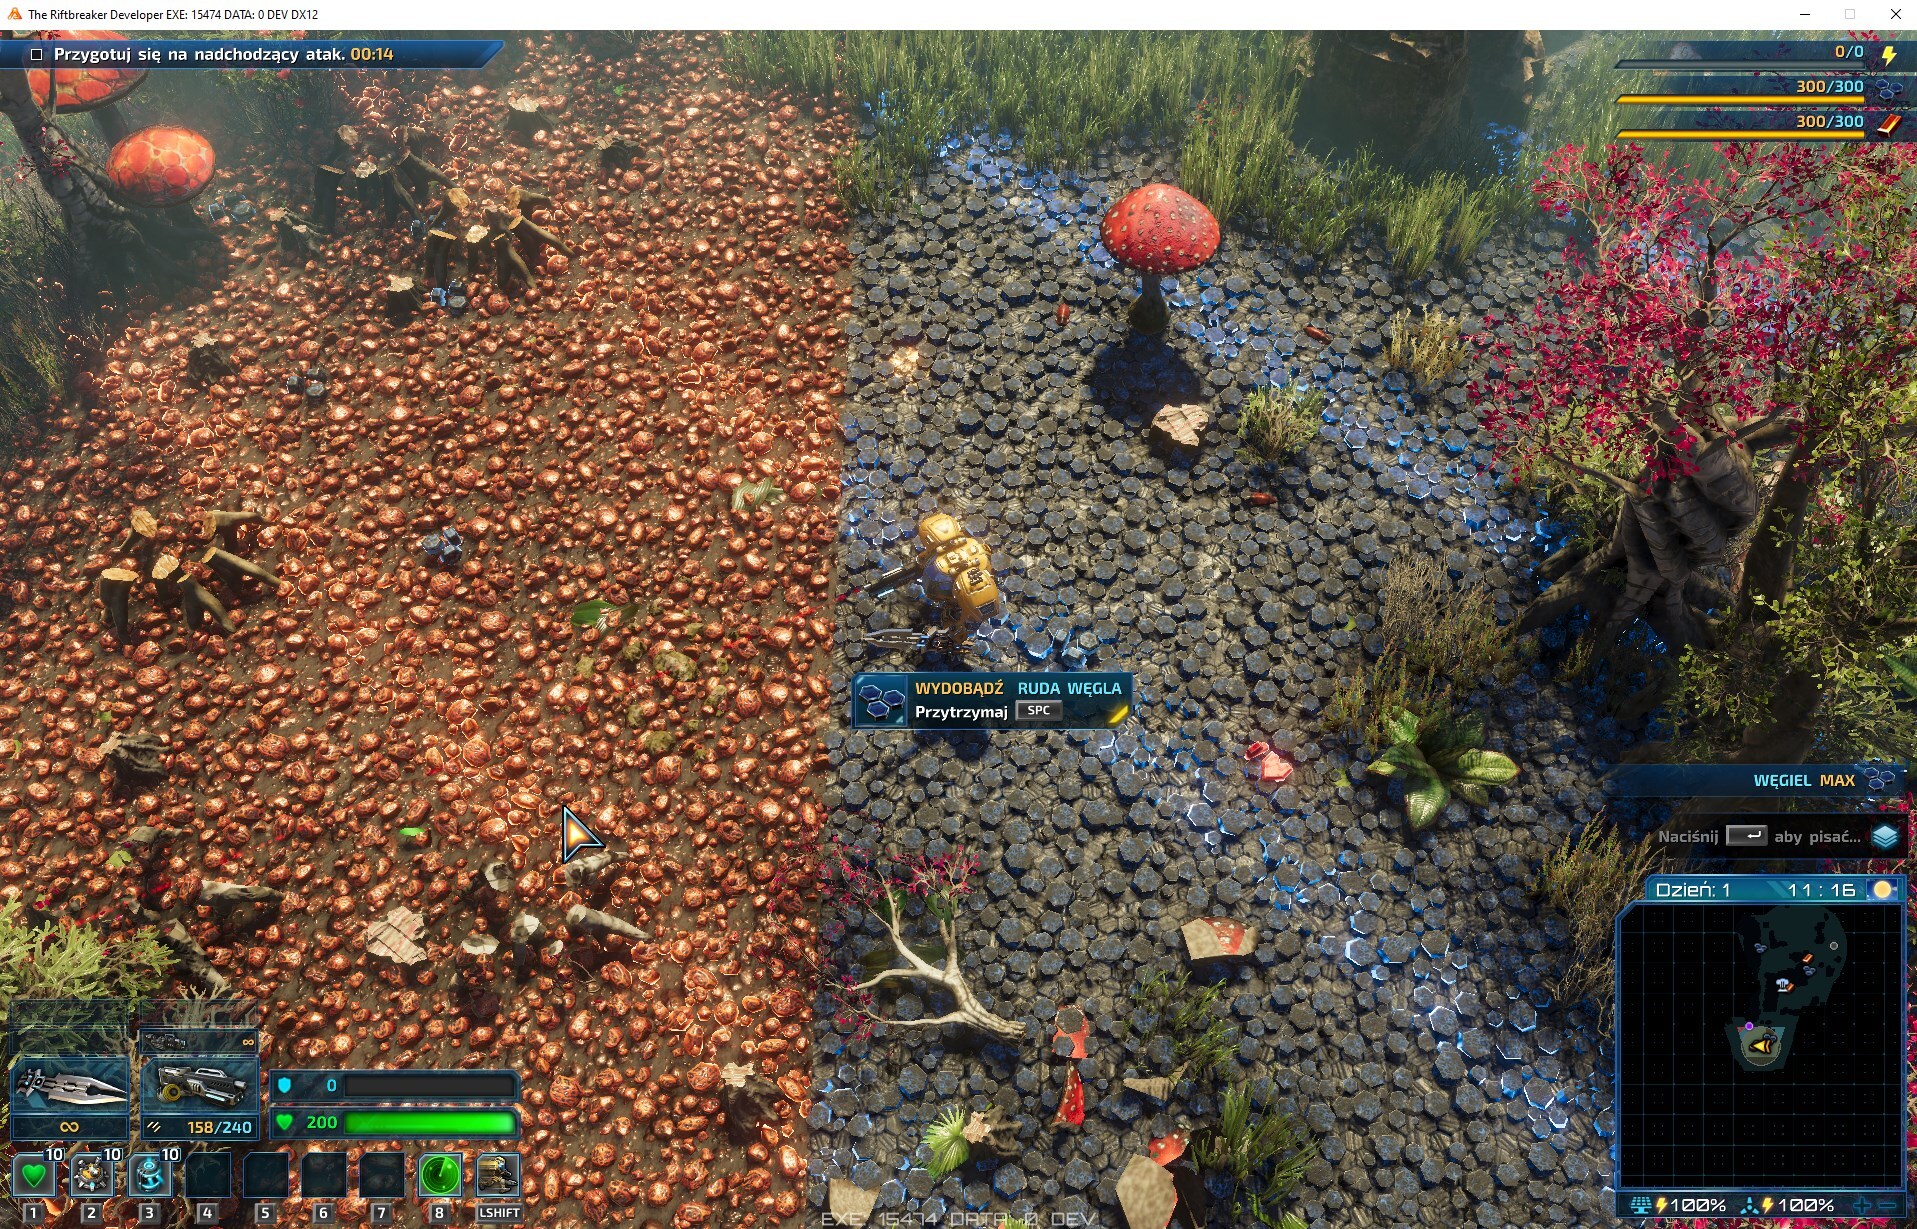
An interesting bug we had due to the 'resource volume factor' parameter. Resource deposits grew not only in density, but also size, taking over the entire map. Classic monkey paw wish situation - you have infinite resources, but you can't really build anything!
RESOURCE VOLUME FACTOR - ranging from 1 to 1000% or up to infinity - this setting dictates how much resources you will find in resource deposits on Galatea 37. Every patch of Carbonium (or any other solid resource, for that matter) is bound by mission rules to have an amount of mineable ore that is set between the minimum and maximum assigned by the level designer. This setting allows you to scale that number. If you don’t want to be on the lookout for new resource patches often, you should increase this value. However, setting it too low may prevent you from completing objectives. Also worth mentioning, this will not affect the amount of resources you receive from underground treasures or biocaches. Only mineable resource patches are affected.

Reducing research time factor even allows you to make our GUI scream in agony. The poor thing will not be able to keep up with research timers and the 'research complete' messages.
RESEARCH TIME FACTOR - ranging from 1% to 500%. This is a really interesting one to describe. Some of you might already know this, but the time it takes to research any piece of tech in the Riftbreaker is dictated by one of the two resources - Download for Building and Weapons tech, and Analysis for Alien Research tech. These resources are produced by Communication Hubs (Download) and Alien Research Laboratories (Analysis). Each tech item has a set amount of Download/Analysis you have to accumulate, and building more Hubs and Labs allows you to do it faster. This option scales the amount of tech/download needed, so it can lengthen or shorten the time necessary to invent the tech.
RESEARCH RESOURCE COST - 1% to 500% - The Riftbreaker Update 2.0 comes with many changes that result in players having access to much more resources than before. We decided that rather than slowing down your production rates to keep those resource numbers in check, we’d rather make resources more meaningful. Each research item in Campaign Mode now has a resource cost, making you think twice about your next move and the order of research. However, if you don’t like the prices we’ve set for our tech items, this option will help you adjust them to your liking.

If you don't want to worry about the economy too much, setting building cost and speed to very low values will allow you to build a base of your dreams in mere minutes. Then, you can just focus on fighting the enemy waves. Remember to adjust enemy strength accordingly to give them a fighting chance!
BUILDING COST - 1% to 500% - Changing this value will affect the cost of buildings, except for two exceptions: Headquarters Level 1 and Solid Materials Storage Level 1. These buildings need constant costs to avoid issues with progression. Other building costs scale normally.
BUILDING TIME MULTIPLIER - 1% to 500% - This modifies the time required for building construction. Not much more to say about this, really!

No, game, we haven't dropped _some_ weapons, we have dropped an entire armory.
ITEMS DROPPED AFTER DEATH - 0 to 6 - This affects how many of your equipped weapons Mr. Riggs will drop after falling in combat. In single-player game modes, this will happen every time your Mech is reconstructed. In multiplayer, you can avoid this by reviving a downed mech before it explodes.
DEATH SKULL MAX NUMBER - 1 to infinity - This is a part of our new system, which aims to prioritize keeping players alive at all costs and playing a bit more carefully. Every time your mech is downed in combat, you will get a skull marker. If you die again with a skull marker on you, you will lose some resources - you can set the exact amount with a different parameter. In multiplayer, skull markers make it more difficult to revive you, as each skull extends the time necessary to pick you up. However, you only lose resources if your mech has to be reconstructed in the HQ. This parameter determines the maximum number of skull markers you can accumulate. (The most we’ve seen is 25. Can you do better?) Limiting the number of max skulls will cap the potential penalty, leading to a more relaxed experience. We will provide a detailed explanation of the entire system in next week’s article!
DEATH SKULL TIMEOUT - 15 seconds to 10 minutes - Death skulls disappear over time. This determines how long it will take to get rid of each of your skulls.

"The first skull is free!" is our in-office saying if someone dies on the job for the first time. The second (and each one after that) is not free, though.
DEATH SKULL MECH RECONSTRUCTION DELAY - 0.25 seconds to 3 seconds - This determines how much longer it will take to reactivate a downed mech with a skull marker. This value adds up for each skull, so if you set it at max, you really have to carefully consider whether it’s worth risking your own mech for a friend. Does not affect single-player gameplay, since there is no one to pick you up anyway… Sad.
DEATH SKULL RESOURCE PENALTY - 0% to 100% - If you aren’t picked up before your mech explodes and you have a death skull, you will lose some resources. This parameter allows you to set how much Carbonium and Ironium each skull will “cost” you. This penalty stacks for each skull, but it can’t go beyond 100% and will not put you in generational debt. At worst, you’ll have to pay a hefty sum to summon a new mech. Setting it to 0% disables this mechanic, allowing for a more relaxed style of play.
ENEMY WAVE STRENGTH - easy, normal, hard, or brutal - Attack waves in our game are generated based on the game’s base difficulty level and a number of additional factors. We create groups of attackers for each difficulty level individually. Then, the game determines how many groups to spawn and which groups are suitable for that moment. This parameter determines which “bucket” of enemy groups the game is going to choose from.

This is the second wave of the Fungal Forest survival at 5x attacks per wave. Good luck, but we have seen some people successfully complete missions like that. We don't know how.
ATTACKS PER WAVE MULTIPLIER - from 1 to 5 - This parameter will change how many groups of attackers the game will send at you during waves. At 1, you will get the baseline Riftbreaker combat experience. Setting this parameter higher will multiply the number of enemy groups in each attack wave. This does not affect the number of ambient creatures that will spawn. Warning! Sending more enemies will stress your CPU. Only increase this setting if you have a powerful PC or if you don’t mind that the game might slow down during intense moments.
MAP SIZE (Survival Mode) - from 3x3 up to 12x12 - Maps in The Riftbreaker are randomized. We manually create map tiles that the game uses to stitch together the entire play area, allowing you to explore it. The most basic tile size is 128x128 grids, which translates to 256x256 meters. By changing the map size, you determine how many tiles the map will be constructed from. Remember that the bigger the map, the more demanding it will be for your PC. This setting is only available in Survival mode. In Campaign mode, many missions feature custom maps, which are not necessarily square.
GAME DURATION (Survival Mode) - from 15 minutes up to infinity - This setting allows you to control how long the main portion of a Survival run will take. When you start a new Survival mission, you enter a warmup phase. After the warmup time runs out, the main part of Survival begins. You can control its duration by adjusting this parameter.

Stretching the warmup time a little bit allows you to use strategies that would never have worked in a Survival scenario otherwise. For example, you can greet the first wave with a wall made of defensive towers. Does it still count as defense, though?
WARMUP DURATION (Survival Mode) - up to 3.5 hours - By adjusting this value, you can give yourself more time to find a good spot for your HQ and set up some basic defenses. Or you can add a lot more time to create a super overpowered, impenetrable fortress. Available only in Survival Mode.
WAVE INTERVAL - 15-second increments up to 30 minutes - This setting dictates the length of the countdown until the next attack wave. The default values differ from map to map and by difficulty level, but we usually hover around 4-8 minute range. Lower this value for more intense scenarios, or increase it to get more time between attacks.

If you don't want your precious base to be smashed into pieces by meteors, you have the option to disable negative in-game events.
ENABLE NEGATIVE EVENTS - There are plenty of disasters waiting to strike in every biome of Galatea 37. If you disable this option, you won’t have to worry about acid rain, tornadoes, firestorms, or alien nests popping up all over the map. However, you can still enjoy the positive events, such as strong winds boosting your turbines or comets bringing in new, valuable resources.
TIME OF DAY PROGRESSION - This allows you to set your game to regular, continuous time progression, or choose to play during the day or night only.
ALLOW SANDBOX CONTROL PANEL - If you enable this feature, you can access the special menu under the F11 key on your keyboard. It will allow you to experiment with various enemies, enable cheats, and trigger events such as meteor showers, for example.
IRON MAN SURVIVAL
This mode is designed to test your Mech combat skills. You will be underpowered most of the time, thanks to the increased research length, and you won’t be able to rely on your base as much due to higher building costs and longer construction times. However, the challenge is not insurmountable. A slightly longer warmup and a steady wave interval leave you with just enough time to beat the odds.
NO MERCY SURVIVAL
This challenge requires you to know the game inside and out. Buildings and technology costs are minimal, but the waves just keep on coming. You also can’t afford to take damage from any units, as they hit like a truck. You have to rely on base defenses, and you’d better be quick about setting them up.
INTENSE CO-OP SURVIVAL SCENARIO
We often use this scenario as a final test for a new co-op build. We usually play this in a group of three or four people. The waves keep coming all the time, and if you take too long eliminating them, they can overlap - a new attack might come before you’re done with the cleanup. This is balanced by lower damage dealt by units and reduced costs across the board. Needless to say, everyone has their hands full at all times.
CAMPAIGN MODE SUGGESTIONS
The Campaign mode playthroughs are designed to be more relaxed and allow you a bit more breathing room than the Survival Mode. Whether this approach is right for you depends on your taste and individual strengths as a player. Here's a list of our suggestions on how to approach that.
Ad that's it for today's article. Next week we are going to discuss our Death Skull system in greater detail, so don't miss that! If you have your own preferred custom settings for Survival or Campaign, feel free to share them in the comments! We're sure that our Discord community at https://www.discord.gg/exorstudios would also love a good challenge. We might even try some of them out during our streams at https://www.twitch.tv/exorstudios which happen every Tuesday and Thursday at 3 PM CEST. See you there!
EXOR Studios